Fyodor, “Last Survivor” concept art
Fyodor
is a freelance CG artist from Saint-Petersburg, Russia who uses Corona Renderer to create concept art. We spoke with him about his workflow and techniques, focusing on the steps to create one particular image.
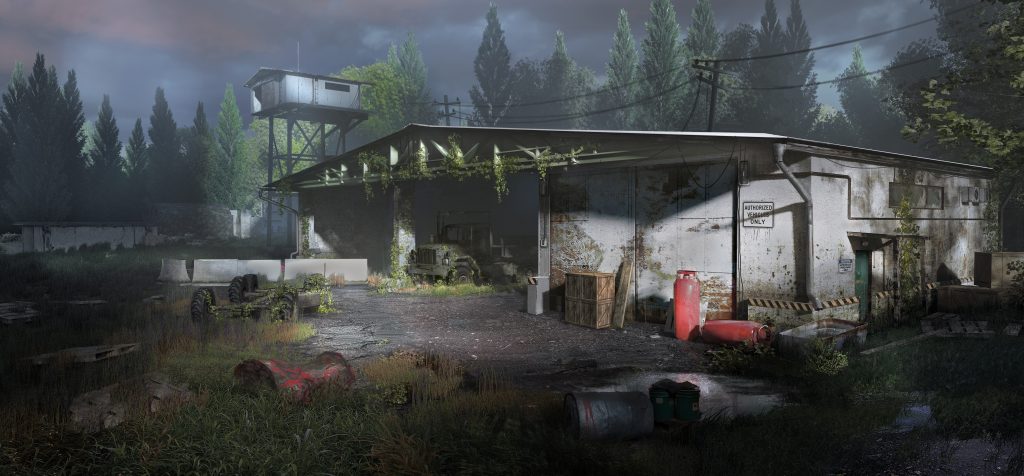
Read more!
Hi! My name is Fyodor and I am a freelance CG artist from Saint-Petersburg, Russia.
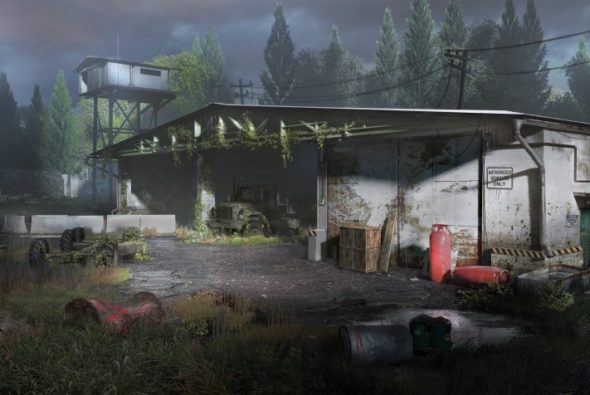
In this article, I will talk about how I created concept art for an in-development video game, “Last Survivor”, and also about my first experience of creating environments using 3D.
First, a little about the game. “Last Survivor” is a third-person session arena game with RPG-elements, a unique mash up of “Battle Royale” game mods, the “Hunger Games” movies, and the “Dark Souls” game series.
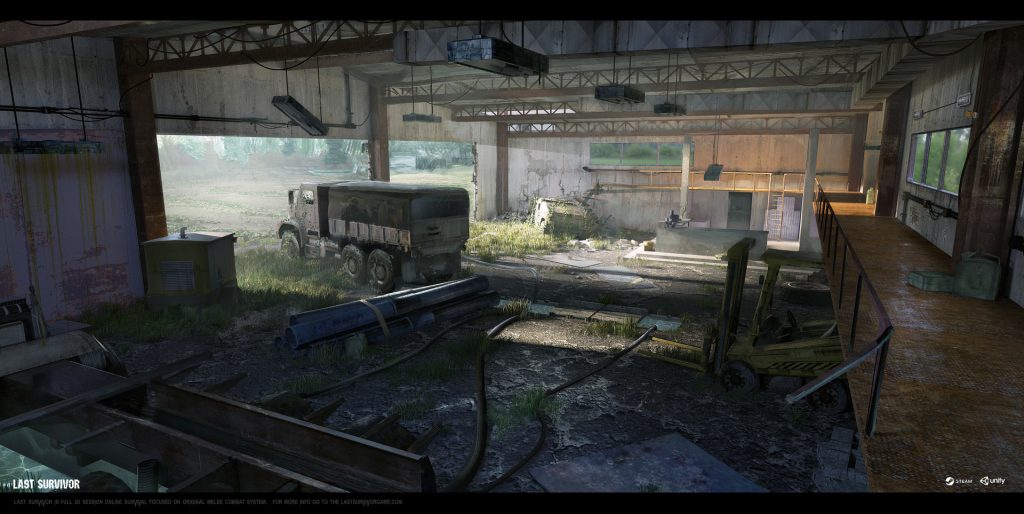
I was an environment artist on this project and created environment concepts in collaboration with Oleksiy Rusyuk and Max Kiselyov. They’re really great, take a look at their works on Artstation if you interested!
The early concepts were created in Photoshop using photobashing techniques. Of course, that took a lot of time and the quality was rather low, so it was decided to use 3D to help the work go faster.
I didn’t even think about what render engine I wanted to use – Corona Renderer was the only option! From the first time I read about it on the Instagram of Maciej Kuciara, I was impressed by how easy it was to set up and the speed of the renderer.
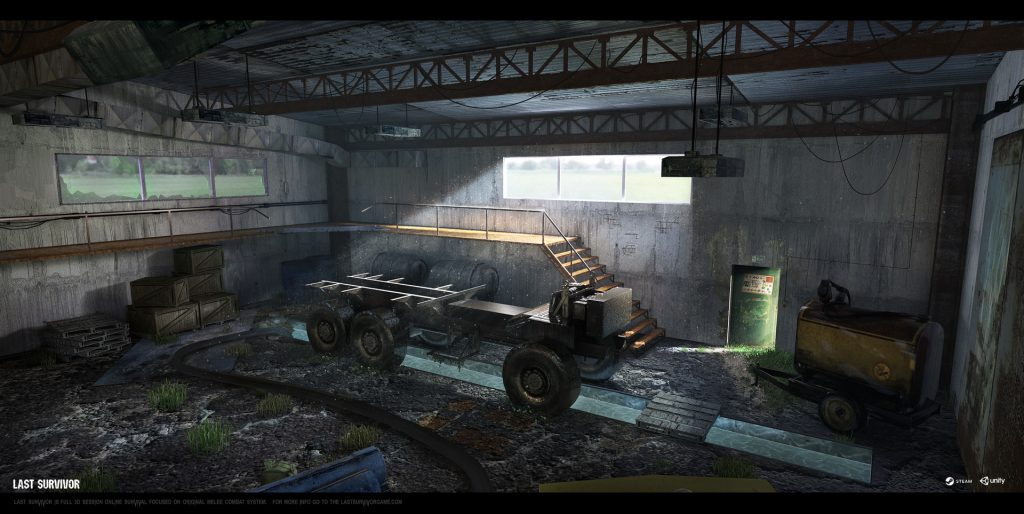
In the initial stages of work, I created a few concepts that determined the location of the main facilities and buildings. After that, I had a simple 3D-blank for locations, and that helped me skip the sketching stage, and I could just do quick renders from different camera angles and with different lighting. I don’t have the original thumbnails for the exterior image, but they looked something like this set for the interior of the same location:
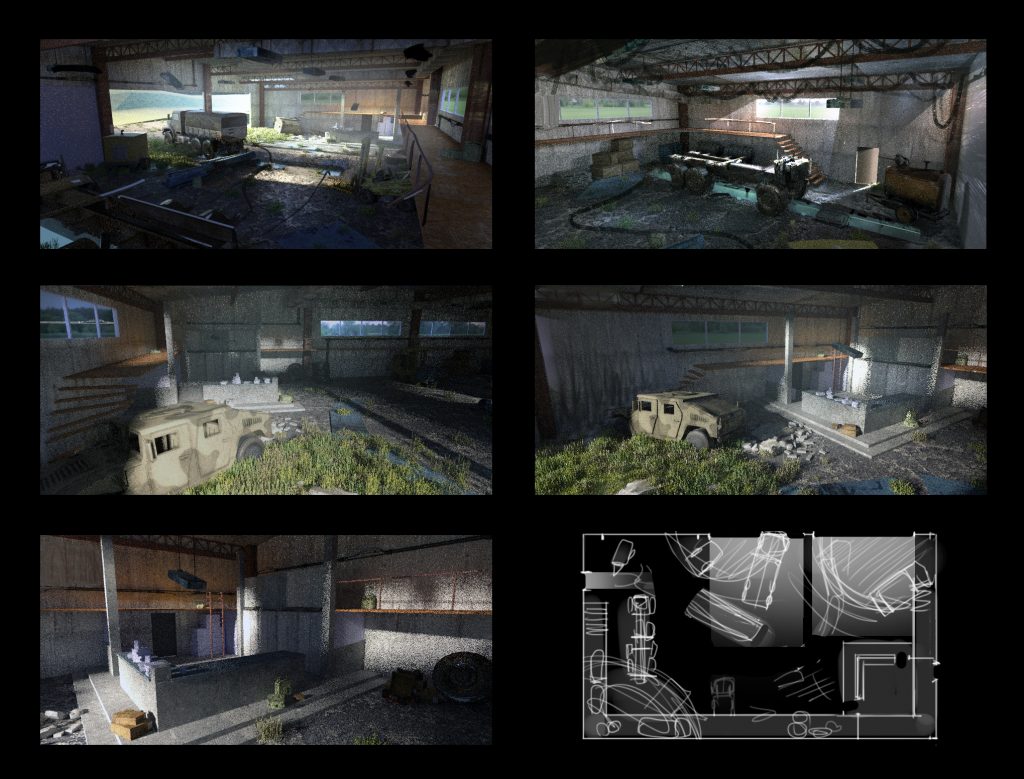
The main view was chosen as a concept to help the level-designer, and for use in promotional materials, and a top view with parts of the roof visible was also chosen.

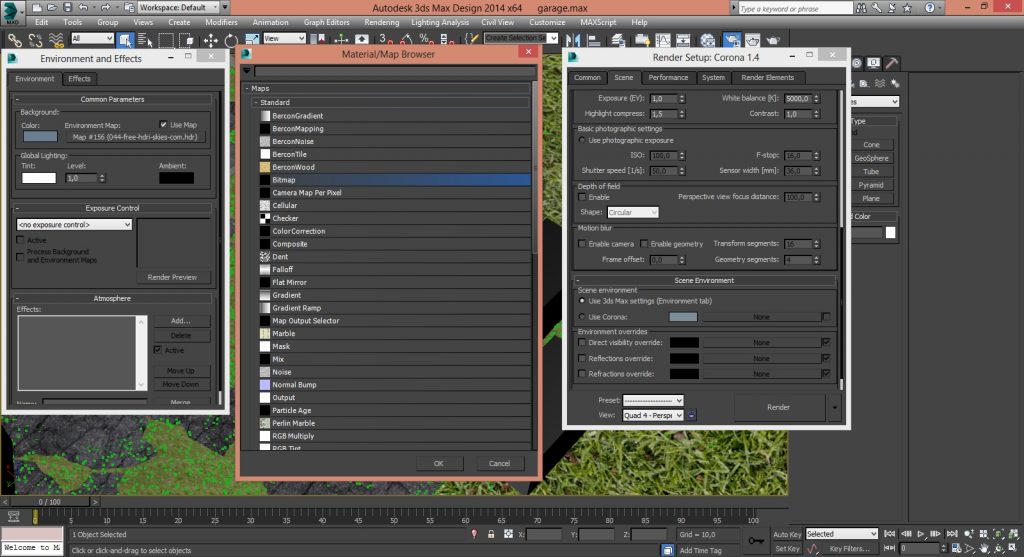
For environment lighting, I used the standard 3ds Max Environment with an HDRI. Despite the fact that the sky in the picture is not very bright and doesn’t contribute much lighting, the environment map still specifies the necessary atmosphere and gives a certain variation in color.
Then I set up a CoronaSun, using the Size parameter to determine the softness of the shadows in the scene. Also, I place the sun a long distance away from the scene itself – more about why later!
Scene can look pretty boring when they are evenly lit. Life continues even outside the scene and some objects there may still have an affect on the lighting, so I think it is necessary to show them even if they are not the centerpiece of the image.
For this particular image, I wanted the look of the “calm before the storm” – that time when dark storm clouds meet a clear sky, making the sun seem brighter and the dark clouds even darker, with the landscape showing incredible shifting contrasts and colors playing across it due to the fast-moving clouds. As the clouds block the rays of the sun, different objects and buildings are highlighted. This time is beautiful to look at… and a bit daunting too!
This was why I placed the sun a long distance from the scene itself, because now I can place simple cubes between the sun and scene. They don’t need any material on them, as they are just there to play the role of “clouds blocking the rays of the sun” and cast varying shadows over the scene. Using the Corona Interactive Renderer to see the results, I set up the location and size of the cubes to create interesting lighting. The scene setup is shown below:
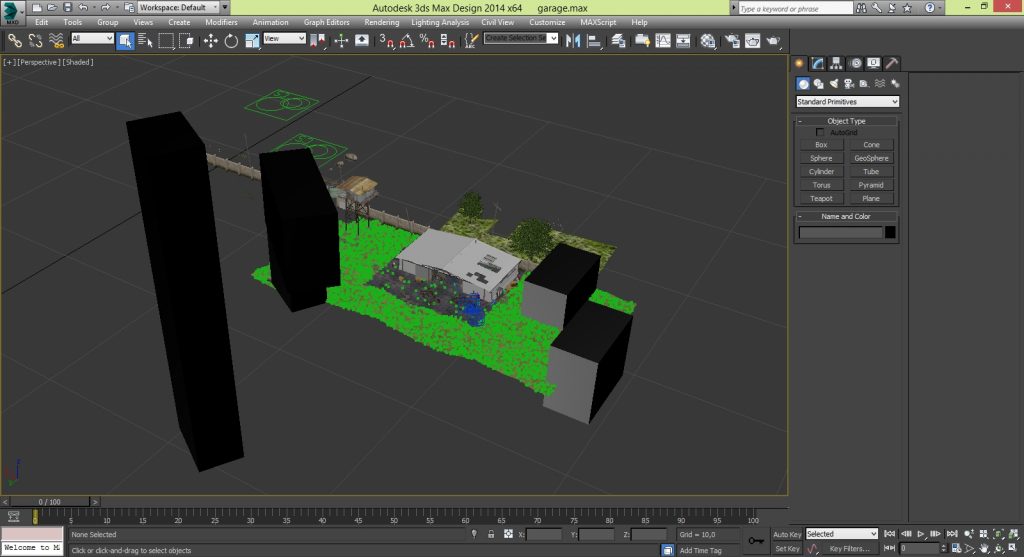
After that, I start to add detail the area. This was one of my first attempts at creating environments in 3D and for this one, I overloaded the scene with unnecessary details! I removed them later during post-processing. I avoid doing this now, and use as few objects as possible in the scene.
I create grass and trees using Corona Scatter. The ivy on the wall was made from the leaves of the trees, by detaching them from the model and using copy-paste. I do not really pay much attention to the the texturing of the scene and objects, and I just change the diffuse channel of the material and sometimes change its scale.
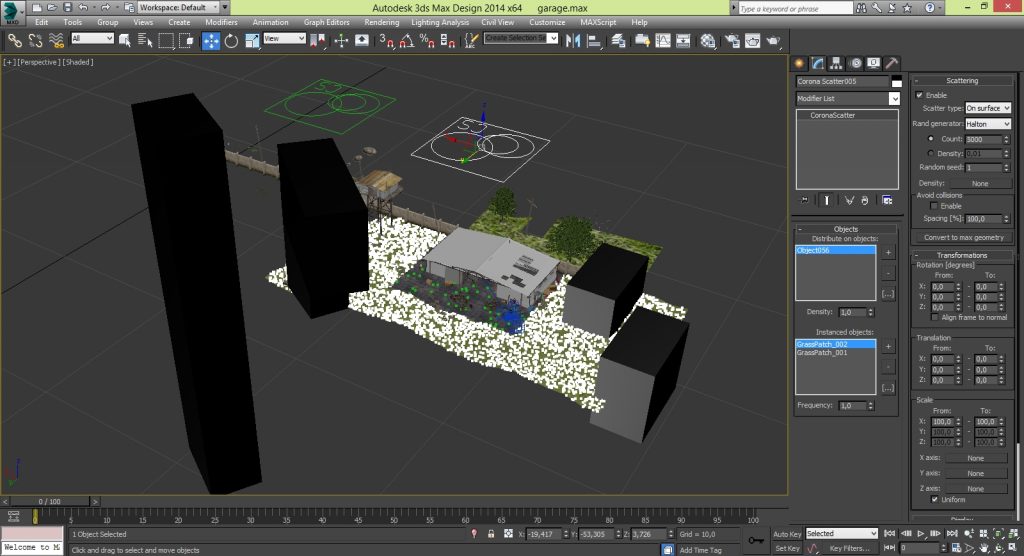
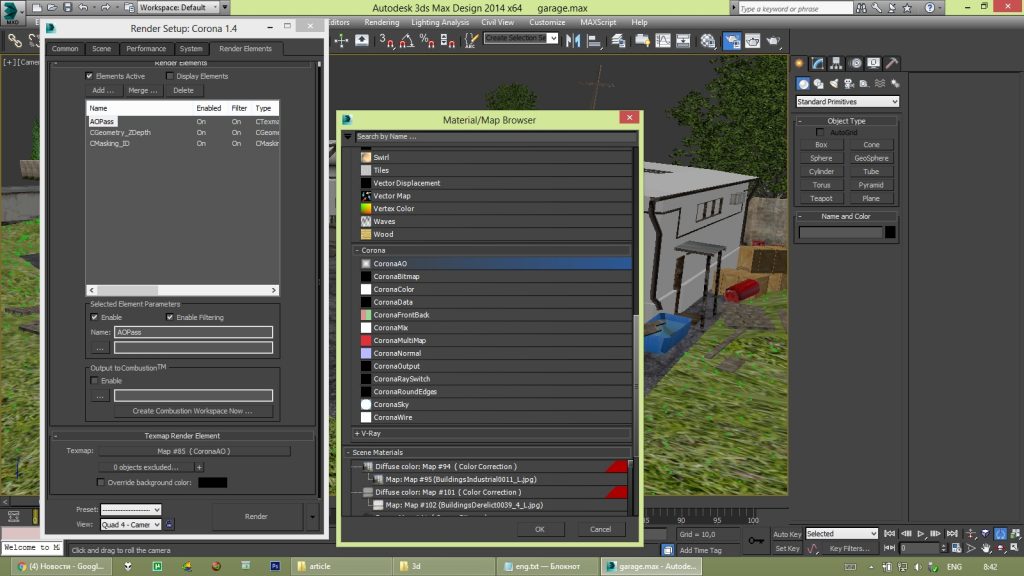
At this point, the 3D setup is almost finished! Before moving on to rendering, I open the render settings, go to the Render Elements tab and add three additional elements. This means I end up with the following passes:
- Beauty Pass
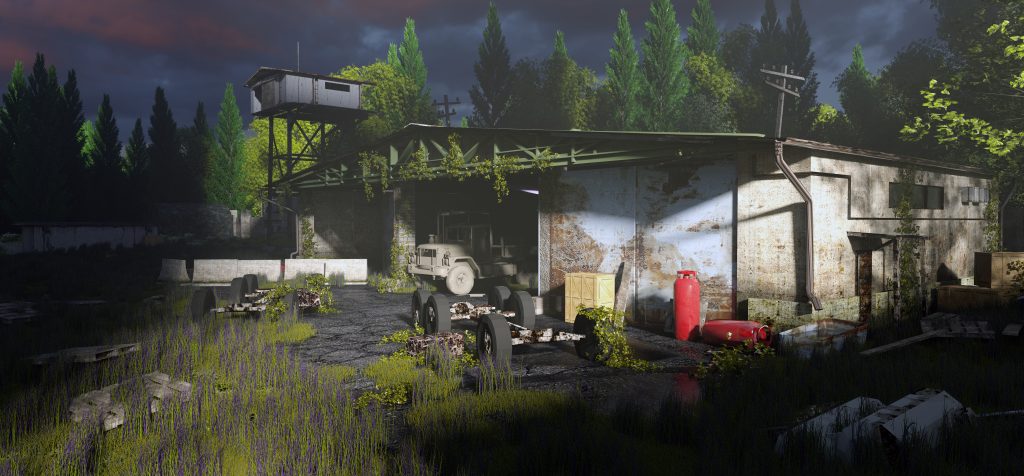
- CMasking_ID – to create a mask for each object in the scene. Using this, you can work with the objects individually in Photoshop.
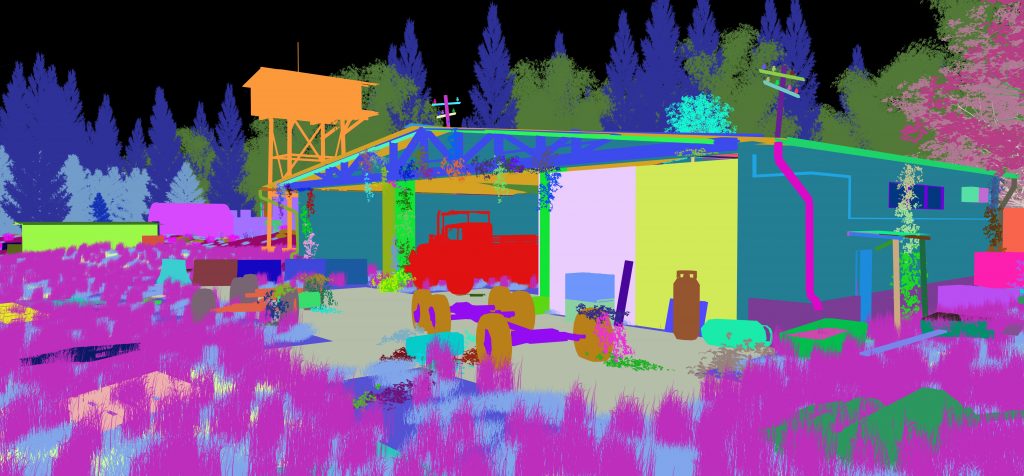
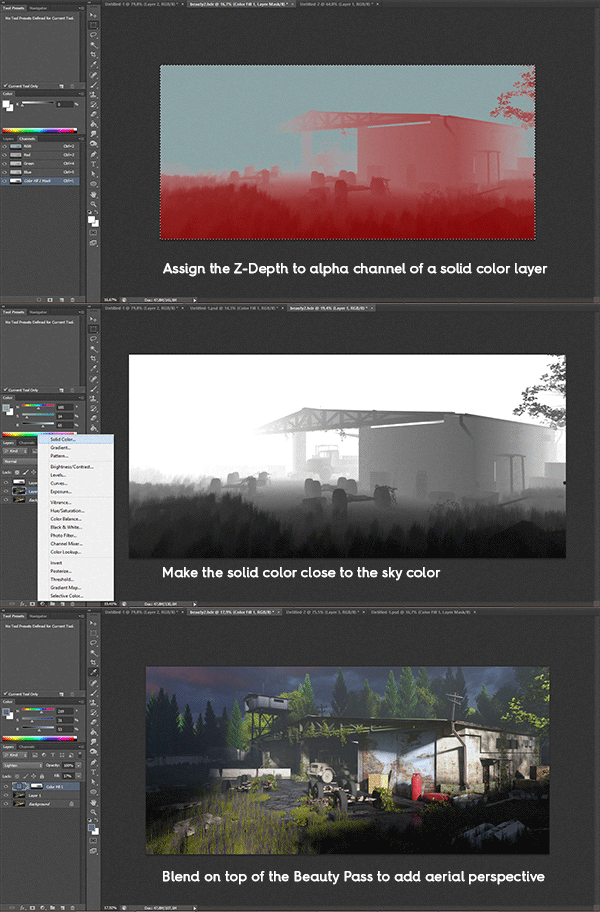
- CGeometry_ZDepth – a depth map which will be used to create aerial perspective.
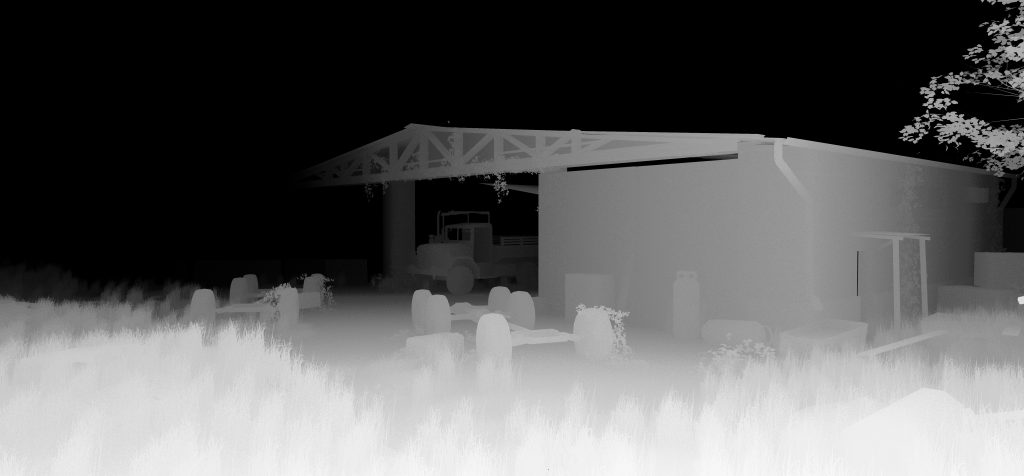
- CTexmap with a CoronaAO material – with skillful use of Overlay blending mode in post-process, this ambient occlusion pass can give extra depth to the shadows in an image and pick out the geometry.
Before saving, I change the Tone Mapping in the Post tab of the Corona VFB, which can give interesting effects. Mostly I adjust the Exposure and White balance. Then I save the Beauty pass in .hdr format, so that I can further tweak the exposure and gamma in Photoshop, and the other passes I save in .png format.
Now on to the final stage – paintover. At this stage, I see how many mistakes I made and how terrible the final render looks as a result! But that’s ok when planning to use paintover for the final image, as most concept artists do these days.
First, I load the Beauty pass. This was saved in * .hdr format, so it has full 32-bit color depth and this is useful as it allows tweaking the exposure settings in Adjustments>Exposure in Photoshop.
The disadvantage is that some of the Photoshop filters will not work with this color depth, so once done with any exposure tweaks, I use Image-> Mode and set that to 8bits/Channel. This opens the HDR Toning dialog box which is the last opportunity to adjust the exposure and gamma.
Into the second layer, I load the CMasking_ID pass, which I always keep on top of all the other layers to allow for easy selection of individual objects.
Next, I create a new solid color layer in Photoshop, with a color close to the sky color from the Beauty pass, and set the blend mode to Lighten (you can also experiment with Color Dodge, Screen, Lighter Color and other blend modes to achieve interesting effects).
After creating that layer, I copy the Zepth pass into its alpha channel, which adds atmosphere and aerial perspective to the image. Next, I create another layer where I use the soft brush to slightly separate objects from each other using the mask, thereby creating an even greater sense of aerial perspective.
This is where all the tweaks end, and more routine work begins. I use some photo textures to add detail to the image, use color correction on individual objects or parts of the image, and so on. Sometimes I paint manually onto the image using the Mixer Brush.
I merge the layers and then enhance the highlights and brighten areas that are too dark areas by using a soft brush in Color Dodge blending mode. I use Levels and Curves to fix the overall image if it’s too dark or too bright.
Finally, I added a little color to the whitest and darkest parts of the image by using Selective Color.
In the conclusion, for me Corona Renderer is a powerful tool that lets me concentrate more on the composition and atmosphere of the picture, rather than on technical settings, and that makes digital painting, illustration and concept art tasks much easier!
Thanks for reading!
Fyodor
LINKS
Artstation: https://www.artstation.com/artist/uncleulty


Оставить комментарий
Ты должен быть Вход опубликовать комментарий.